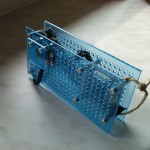
The second post of this series describes the RasperryPi that is connected to the sensors and used to record the data.
Hardware
As described in the first part, I decided to use sensors from Tinkerforge as they are comparatively cheap, require no soldering, no electrical know how and they also provide a convenient API to get the data from the sensors. Ideal for people like me who want to spend more time with using the data instead of playing around with wires, resistors, etc.
The required hardware was just.
- Raspberry Pi (including a case, Wifi USB Stick, SDCard, power supply)
- Usb Cable to connect the RaspberryPi with the sensors
- Sensors
- 1x Master Brick
- 1x Ambient Light Sensor
- 1x Barometer Sensor
- 1x Humidity Sensor
- 1x Temperature Sensor
- 4x bricklet cables to connect the sensors to the Master Brick
- 2x Mounting plates
- Some sets of screws
- NO soldering iron
Overall between 90 and 100€ (excluding the Pi) but it saved me a lot of time.
